Bài 2. Tìm hiểu về Ejs
Sử dụng template EJS trong NodeJS giúp bạn code với các views một cách nhanh chóng. EJS là một template được dùng phổ biến trong nodejs.
Cài đặt EJS
npm install ejs
Khai báo sử dụng EJS Khai báo view engine và chỉ định folder chứa các view:
//index.js
const express = require("express");
const app = express();
const port = 3000;

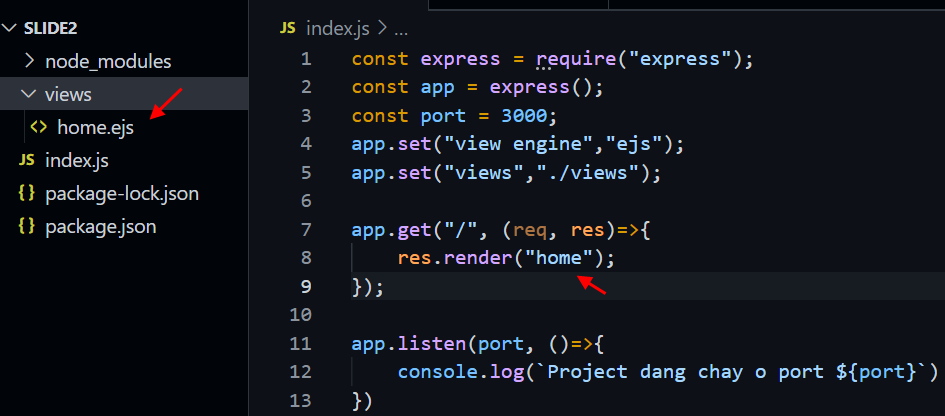
app.set("view engine","ejs");
app.set("views","./views");

app.listen(port, () => {
	console.log(`Project dang chay o port ${port}`)
})
Nạp view: Mỗi file phải đạt trong folder views đã khai báo, và có tên mở rộng là .ejs. Để nạp view và response, bạn dùng lệnh render như sau:

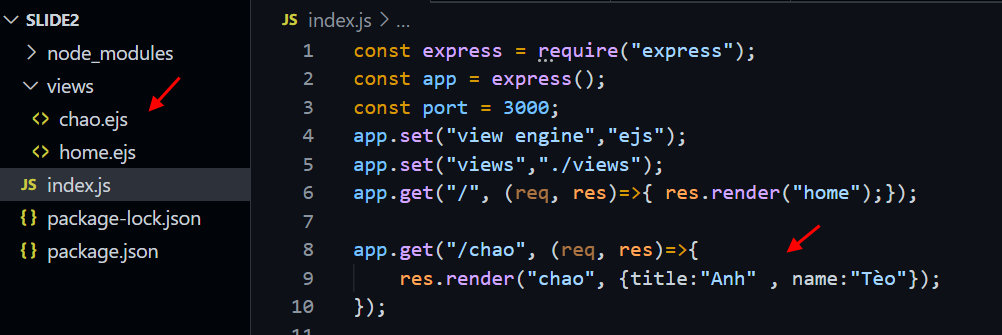
Để nạp view và truyền biến cho view, dùng cú pháp như sau:
res.render("chao",
	{
		title:"Anh" ,
		name:"Tèo"
	});
Để hiện giá trị biến trong view, bạn dùng lệnh: <%= tên biến %>.
Ví dụ:

Code trong view ejs Để viết code trong view ejs, bạn dùng cú pháp <% code js %> .
Sử dụng lệnh if
Chào bạn!
<% if (day=='Thứ bảy' || day=='Chủ nhật') { %>
<h3>Hôm nay là cuối tuần</h3>
<% } else { %>
<h3>Hôm nay là ngày <%= day%></h3>
<% }%>
Vòng lặp for trong ejs view
Trong ejs view, bạn có thể lặp qua mảng rất dễ dàng
app.get("/sp", (req, res)=>{
    var sp= [
        {name:'HTC M9', price:6000000},
        {name:'Samsung S8', price:750000},
    ]
    res.render("sp", {sp:sp});
});
<% for (let p of sp)  {%>
    <p>
        Tên SP: <b> <%=p.name%> </b> <br>
        Giá <%=p.price %>
    </p>
    <hr>
<% } %>
Sử dụng CSS trong view ejs
Chỉ định folder public như là folder gốc cho view truy cập
//index.js
const express = require("express");
const app = express();
const port = 3000;
app.set("view engine","ejs");
app.set("views","./views");

app.use(express.static('public'));
Trong view, nhúng file css đã tạo trong folder public
<link href="css/c1.css" rel="stylesheet">
<% for (let p of sp)  {%>
    <p>
        Tên SP: <b> <%=p.name%> </b> <br>
        Giá <%=p.price %>
    </p>
    <hr>
<% } %>
Nhận tham số dạng từ url
Các tham số trong url có thể truyền bằng 2 cách.
- Cách 1 là các giá trị truyền trực tiếp trong thành phần của url, https://localhost:3000/search/abc/3

app.get('/search/:keyword/:page', (req, res) => {
    let str =`keyword= ${req.params.keyword}<br>`;
    str+=`page= ${req.params.page}` ;
    res.send(str);
})

- Cách 2: là các giá trị truyền đến như tham số , mỗi giá trị có tên. http://localhost:3000/cat?idcat=10&page=3
app.get('/cat', (req, res, next) => {
    str=`idcat= ${req.query.idcat} <br>`;
    str+=`page= ${req.query.page}`;
    res.send(str);
});
Sử dụng form
a. Trong index.js, nạp module body-parser và use
const bodyParser = require("body-parser");
app.use(bodyParser.urlencoded({extended:true}));
b. Tạo 1 view chứa form. Tag form phải có thuộc tính action trỏ lên 1 route sẽ nhận dữ liệu khi user submit
<form action="/addEmail" method="post">
    <input name="email">
    <button type="submit">Add Email</button>
</form>
c. Tạo route để nạp view
app.get('/addEmail', (req, res)=>{
    res.render("addEmail.ejs");
})
d. Tạo route tiếp nhận dữ liệu
app.post('/addEmail', (req, res)=>{
    let email  = req.body.email;
    res.send(email);
})
Upload hình trong form
Để thực hiện upload hình từ form, bạn cần thực hiện :
Cài đặt module formidable
npm install formidable
Nhúng module vào trang, nên nhúng luôn module file sytem (fs) để tiện các thao tác trên file đã upload
var formidable = require('formidable');
var fs = require('fs');
Tạo 1 view chứa form. Tag form phải có thuộc tính enctype=”multipart/form-data , trong form có tag <input type=”file”> và form phải có thuộc tính action trỏ lên 1 route sẽ nhận dữ liệu
<!-- addproduct.ejs -->
<form action="/addnewprod" method="post" class="form" enctype="multipart/form-data" >
    <p>
     <label>Tên sản phẩm</label> <input type="text" name="productName">
    </p>
     <p>
     <label>Hình sản phẩm</label> <input type="file" name="productImage">
     </p>
    <p> <input type="submit" value="Thêm sản phẩm"> </p>
</form>
Tạo route nạp view chứa form
app.get('/addprod', (req, res)=>{
    res.render("addproduct.ejs");
})
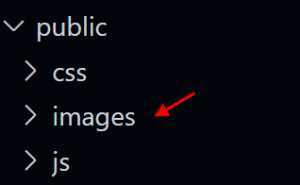
Tạo folder để chứa hình:

Tạo route nhận dữ liệu
app.post("/addnewprod",(req, res) =>{
    var form = new formidable.IncomingForm();
    form.parse(req, function (err, fields, files) {
     let name = fields.productName;
     let tmpPath = files.productImage.filepath;
     let tenFile = files.productImage.originalFilename;
     let destPath =  __dirname +'\\public\\images\\' + tenFile;
     fs.rename(tmpPath, destPath, function (err) {  //copyFile
       if (err) throw err;
       res.end('File đã upload');
     });
      //res.end(JSON.stringify({ fields, files }, null, 2));
      res.send("Name=" + name);
    });
})
Xem thêm: tại đây
Xoá ảnh
Sử dụng module fs :
var fs=require(‘fs’);
Dùng hàm unlink để thực hiện xoá
app.get("/delete",(req,res)=>{
    pathfile="/images/a.png";
   fs.unlink(pathfile, function (err) {
      if (err) throw err;
      console.log('File deleted!');
      res.send("File đã xóa");
   });
});
Đọc thêm tài liệu ejs: tại đây